I’ve been a professional musician for many years, and only recently begun to get into the business on the other side of the microphone, known as audio engineering or recording. I’ve mostly been recording sounds rather than music, and when out and about rather than in the studio, and I’ve discovered that in these conditions a whole lot of noisy problems can arise which can render the recorded audio pretty much unusable.
Recently in an audio forum, somebody posted about some problems they’ve been having with handling noise, and asking for tips and advice for beginners using a portable digital audio recorder. Since I’ve been using one of those myself (although mine is a different model to that of the poster) and experienced similar problems with handling noise, I thought I’d do up a tutorial on what I’ve learnt about addressing the noise issues.
I created this tutorial with the small portable digital audio recorder in mind, but regardless of which audio equipment you use, most of the elements covered here should be pretty useful for all audio field recordists.
Before Recording – First Steps
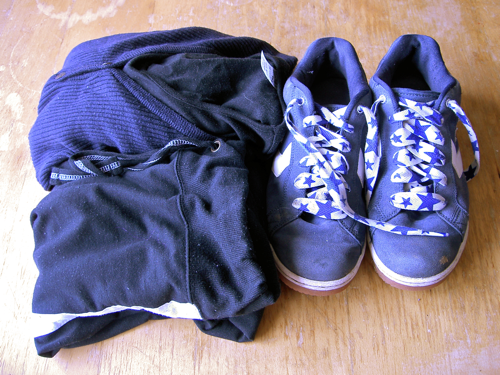
The first thing to do before picking up any recording equipment is to ensure that you yourself are as quiet as possible. This means wearing soft clothes which fit close to the body, with few or no metal parts and few or no dangly bits. This also means shoes with as quiet as possible soles. If you have long hair, ensure it is safely secured out of the way.
After you’ve worked all that out, get your audio stuff together so you can use it conveniently. Ideally you want the least possible amount of equipment cozily stowed away in a single bag. If like me you use a small portable audio recorder with built-in microphones, you’ll probably need both less and more gear than you think. You’ll need more because of needing stuff to isolate your recorder from vibration, but you’ll need less because you can dispense with external microphones, stands, associated windscreens, cables and suchlike.
I’ve compiled a list based on what I use most often when recording out and about.
Stuff To Have
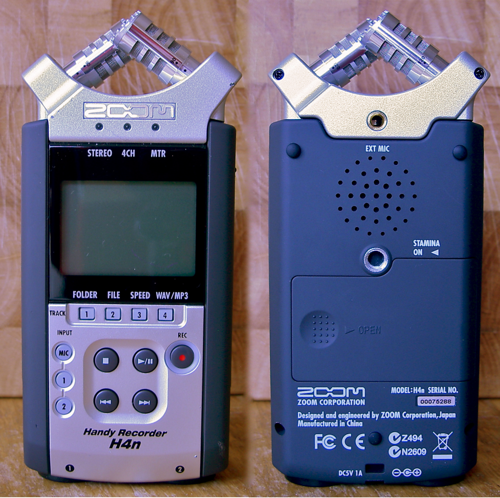
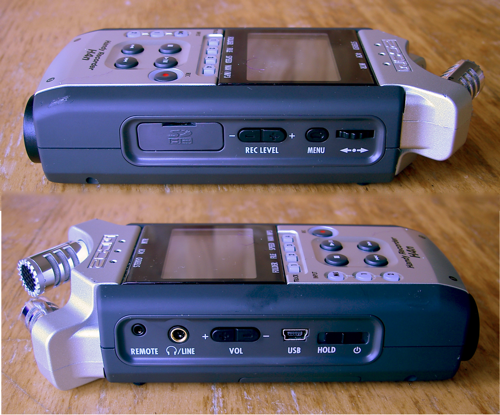
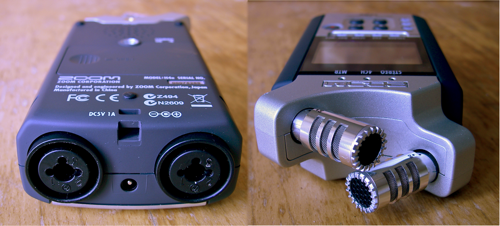
These wee portable digital audio recorders are amazing bits of kit. They’re affordably priced, small enough to carry everywhere to take advantage of those spontaneous audio opportunities, and many of them can capture those unexpected audio gems with amazing sound quality. There are lots of different models out there with slightly different functionality and varying audio quality for different applications, and they are confusingly available at different price points, After doing some research, I found that price and quality weren’t as related as one might expect, so for my purposes I got the Zoom H4n.
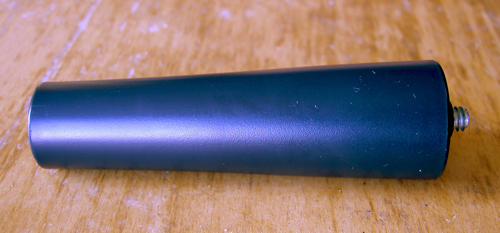
These may come with the recorder or be purchased separately. Mic mounts and stands are designed for audio and tend to be much, much quieter than camera tripods, so I use my adapter constantly. I find it hard to understand why any recorder manufacturer would exclude this accessory from their product package, because there is no way to mount the thing on a mic stand without it. And as far as I can tell, there are no commercially available mic mounts to fit these recorders at all. Yet apparently some manufacturers do exclude this adapter from their product range. Thankfully there are usually a few third party manufacturer options to choose from. In my experience this is a mandatory accessory. My Zoom H4n came with a handy simulated microphone handle. This screws securely into the back of the unit and fits into many standard-sized microphone clips.
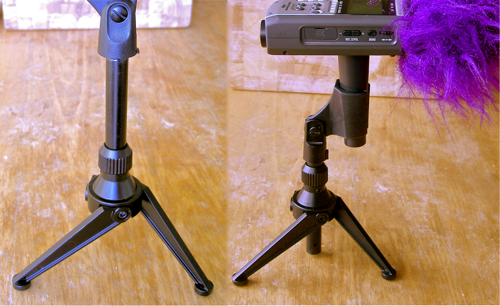
Once you’ve sorted out how to get your portable digital audio recorder mounted on a mic stand, I think it’s really important to have a proper stand to mount it on. A stand helps eliminate handling noise and other unwanted vibration contact in the field. And for being out and about, having something small and lightweight really helps. Believe me, you don’t want to carry around anything like the desktop stand with the 2.27 kilo (5 lb) cast iron base I keep at home. For portability I use the Quiklok A188. Aside from the mic clip which I had to replace due to it being inadequate, this stand is a great bit of kit. Cheap, sturdy, easy to use, small and lightweight, it goes everywhere with me.
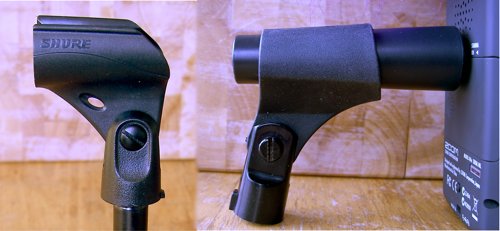
Field recordings often involve motion and different positions including upside down, so a solid rock-steady microphone clip which will hold the recorder in all sorts of circumstances is a must. I use Maplin product code FV08J or the Shure microphone clip which came with my Beta 58A.
These are designed to isolate hot cookware from heat-sensitive surfaces, but they also happen to be exactly the right size for resting a desktop microphone stand on. They also have a really good texture for providing stability and some vibration baffle. And they’re also flat, light, bendy, and easy to stow in a bag. Perfect! I use the Circulon 2 silicone trivet. Le Creuset make a similar one and I’m sure other manufacturers do as well. These are also really handy to have about the house to put under hard drives and other sensitive equipment needing protection from heat and vibration. We’ve got one under our Apple TV.
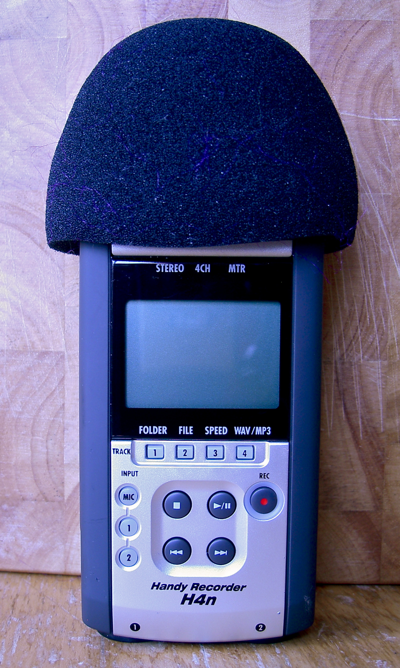
This may come with the recorder, be separately purchased, or made yourself. This is such an important bit of kit, I don’t understand why some manufacturers omit this from some recorders in their product range, but apparently many do. If you must make one yourself, I recommend checking out other foam windscreens for foam type before choosing foam for this project.
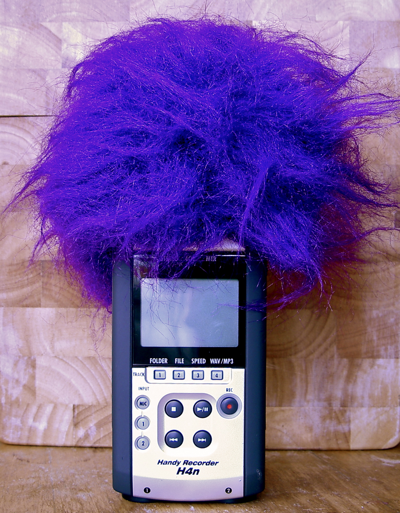
These work best when fitted over a foam windscreen. This is essential for reducing wind noise, especially if you record in
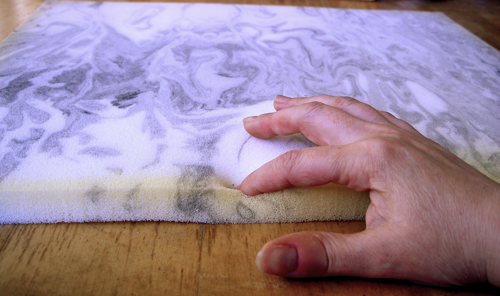
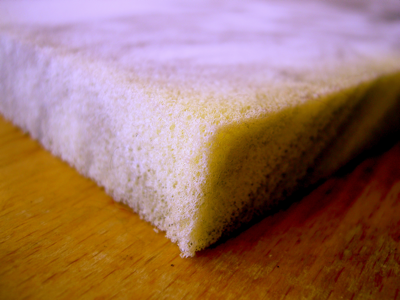
This foam is not only indispensable for isolation from all kinds of vibration including handling noise, but it’s also a quick, easy, light and simple-to-carry solution to unwanted vibration-related noise. Of all possible incredibly useful audio accessories, as far as I’m concerned this stuff is one of the biggest stars of the show!
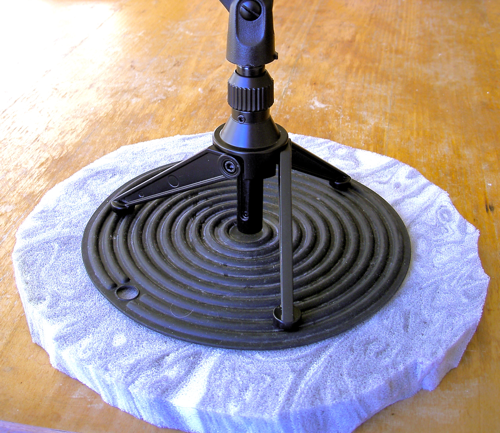
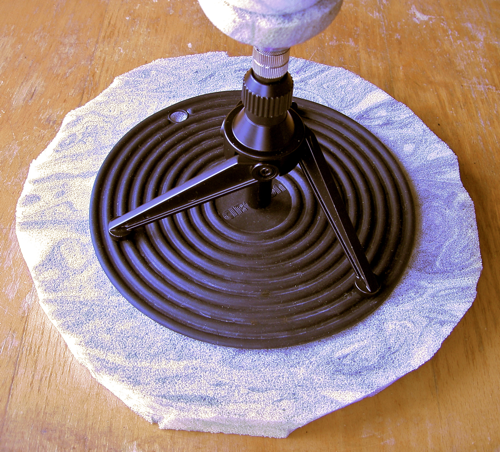
If you cut out a foam circle a few centmetres larger in diameter than the trivet mentioned above, you can use it as a shock absorbing mat. Put the trivet on the mat and the stand on the trivet, and you have a handy, shock-absorbing, cheap and easy fixed-position alternative to those expensive microphone shock mounts.
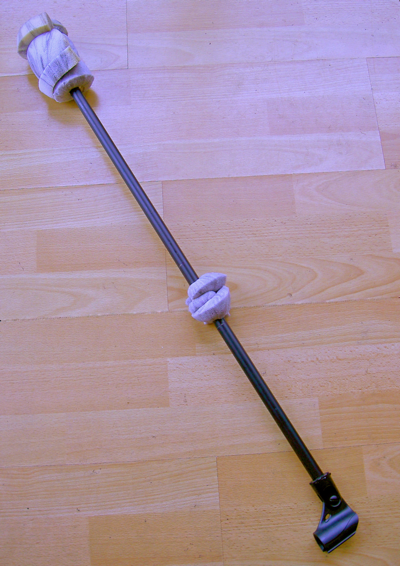
This foam is very easy to cut to whatever size you want, and is incredibly useful for isolating handling noise in mic-mount accessories such as home-made booms and pistol grips.
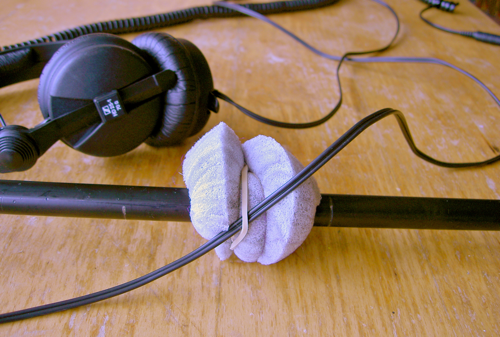
Small pieces can be used with elastic bands to stabilise and secure noisy moving parts such as headphone or microphone cables.
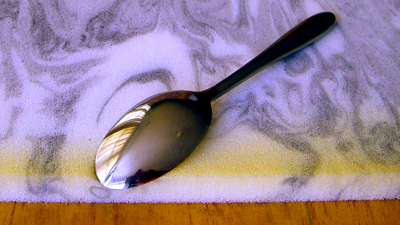
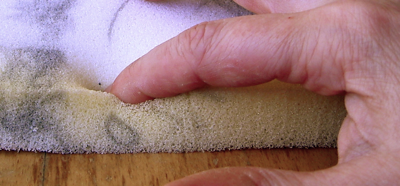
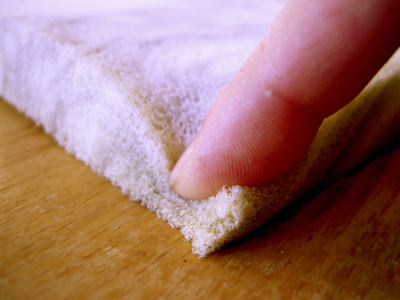
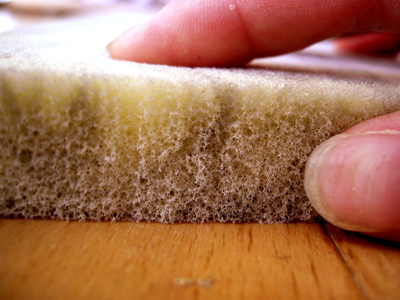
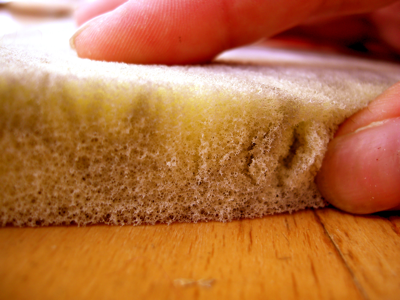
This foam is best acquired in person in a physical shop, so that you can feel it with your hands and hear it with your ears before purchase. Features of good foam for this job:
- Yellowish bits from exposure to UV light
- Almost silent when touched
- Feels very, very soft, rubbery, grippy and elastic
- When touched, yields easily and bounces back immediately
- Picks apart and shreds into crumbs easily
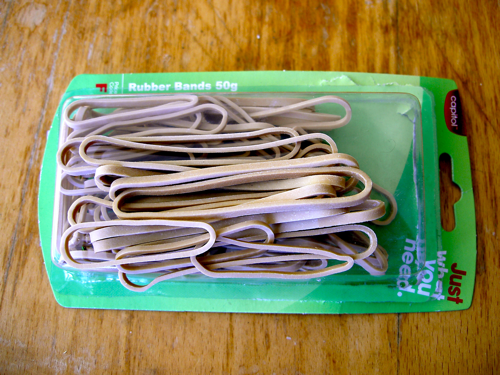
It can be so annoying to need these and not have them! Cheap and easy to find, you’ll need a goodly selection of elastic bands to secure the foam in position.
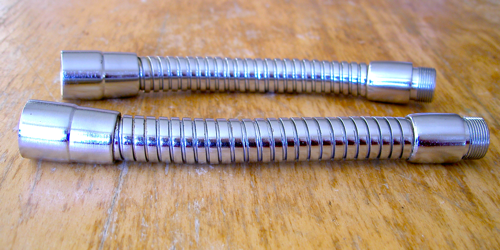
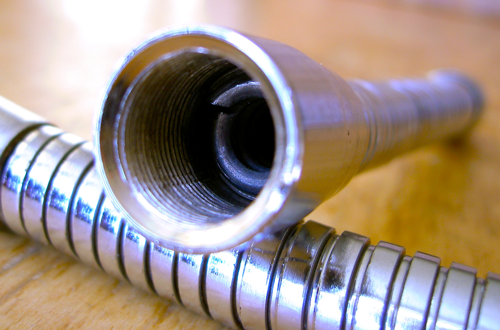
Some suppliers refer to this as a “stand”, but this is actually just the neck without a base.
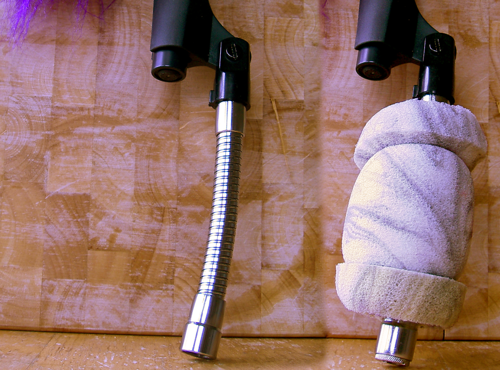
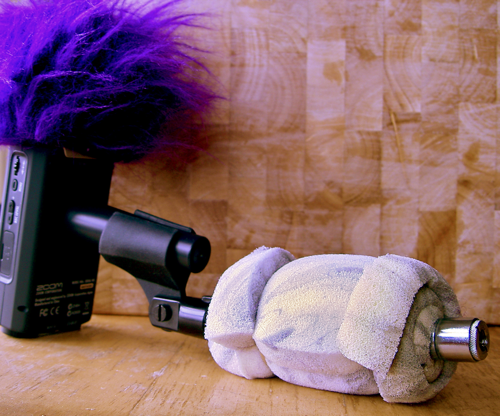
These have bunches of uses. As I mentioned above, you can attach one to your microphone clip and wrap some foam around to make a pistol grip.
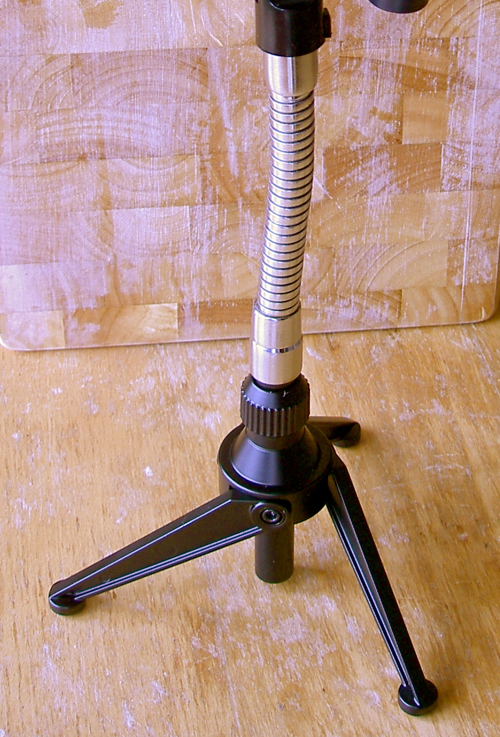
You can screw one into the desktop stand to make it taller and more manoeuverable.
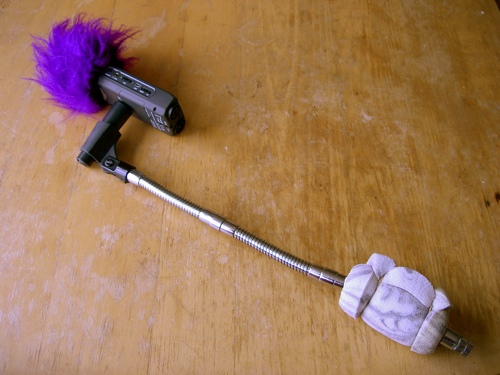
And they screw together to make a boom for recording your own footsteps.
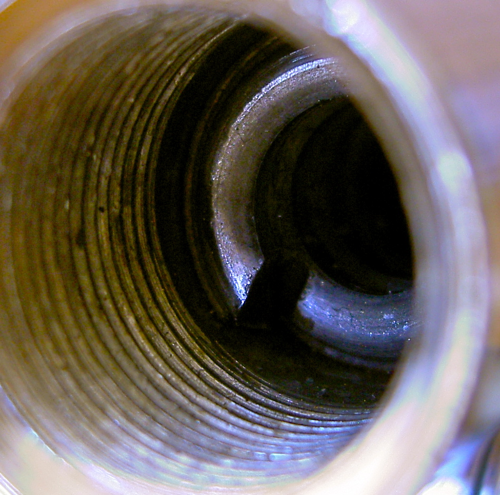
One nifty feature is the split in the threads in the base of the female end – when screwed in fully, this locks the received threads and prevents jiggling noise. These goosenecks are small, cheap, and very very useful.
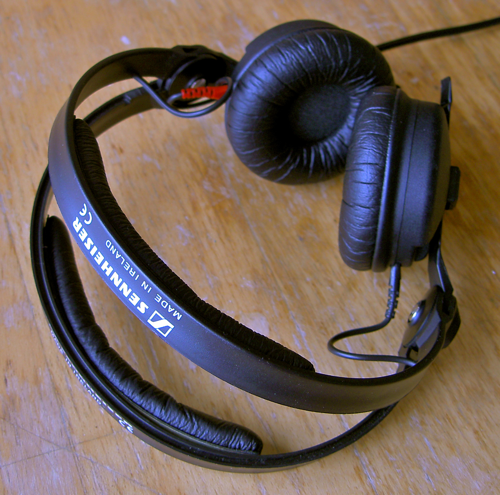
Even though you can see the levels on the portable recorder’s screen, it’s really important to have closed headphones. You’ll need something which excludes surrounding sound to allow easy assessment of the signal, so you can determine any necessary adjustments. I use the Sennheiser HD 25-1s.
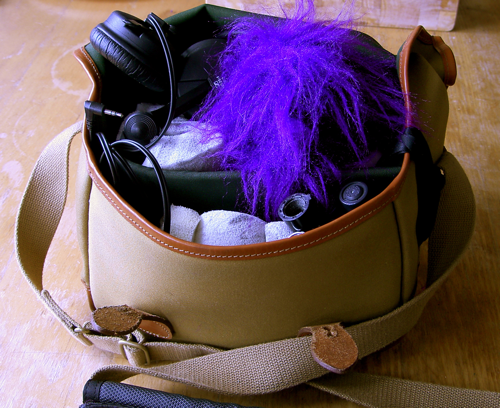
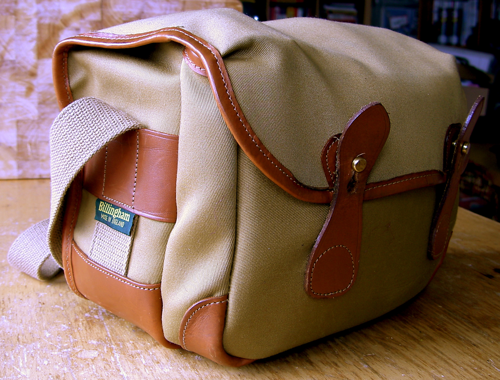
It’s really important to have a suitable bag to safely stow all your precious bits and pieces, and from which you can access them easily when you need them. You may want to consider whether a bag has velcro, snaps or zips which can intrude during recording. I use a Billingham L2 (also known as the Alice) camera bag, which I got second-hand (bargain!) on ebay. The Billingham is a waterproof canvas bag with leather strap closures fitting quietly onto fixed brass studs.
Well, there’s no point going to all that trouble to record stuff if you’re going to noise up your recording yourself just from what you’re wearing. 😛
During Recording – Tips And Tricks
In order to record the sounds I want cleanly and clearly, I’ve learnt some tips and tricks along the way to help me do that. Since you’re here, I thought you might be interested in them too. 🙂
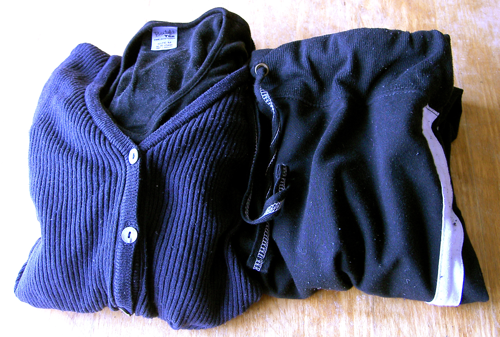
- Wear soft quiet clothes with as few rigid parts as possible
Buttons, zips, snaps, buckles and especially velcro can make sounds which can be picked up by a microphone. Leather clothing and shoes can creak, plastic fabrics can squeak, and some materials can rustle or tap quite intrusively. So to keep unwanted noise to a minimum, check that everything you wear is as soft and quiet as possible. - Wear close-fitting clothes which stay within your body space
The closer your clothing fits to your body, the less likely it is to catch or snag on your equipment or surrounding objects. So to keep audible accidents to a minimum, check that your clothes have no hanging bits or parts which move out from your body, that your sleeves fit closely to your arms, and that everything fits you comfortably and well.
If it’s soft, comfy, close-fitting and quiet, wear it for field recording. - Wear soft shoes with as quiet as possible soles
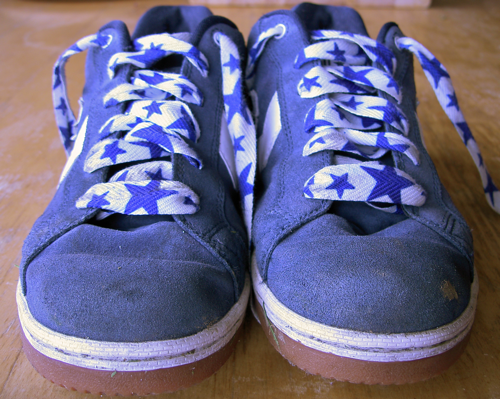
Unless you’re choosing footwear for footsteps or other audio purposes, you’ll want your shoes to be silent contributors to your audio work. So check that the soles of your footwear are as quiet as possible when you walk, that they are made of soft, quiet materials, and that they fit you comfortably and well.
Trendificent foley footwear, with my funky cool (yet quiet) laces. - Keep your body as still as possible
All movement makes some kind of sound – even gentle body movements in soft clothes and shoes can sound intrusive in quiet conditions. Unless you are choosing your movements for audio purposes, you may want your body to be a silent contributor to your audio work. You can increase your chances of getting clean recordings featuring only your desired sounds if you keep your body as still as possible. - Be as comfortable as possible
Recording sound can be surprisingly physically arduous. It’s a good thing you sorted out all those comfy wearables. 🙂 Check periodically that you are arranging your body as much as you can in the most pleasant and relaxed positions. - Only handle the recorder to adjust position or settings
If you’re reading this, you probably already know that handling noise can happen even when you’re not aware of it at the time. As part of the design to keep these recorders small and portable, the built-in microphones have little or no protection from vibration. So they are very sensitive to vibration and will pick it up even when your ears can’t. So to keep handling noise to a minimum, handle your recorder only to move it or change settings. - Isolate the recorder from vibration as much as possible
This is where the foam makes its grand entrance as the star of the show! Take that circular foam mat which you prepared earlier and position it where you want the mic stand to go, put the trivet on it, and set the microphone stand on that for recording. No more vibration noise!
This is a fabulously quiet shock absorbing arrangement. I’ve got the pistol grip screwed into the stand for easy and quiet (ish) handling during recording.
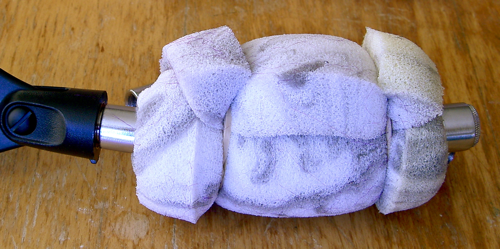
Or if you want to hold the recorder, as I mentioned above you can wrap some foam around one of the gooseneck thingys and secure with elastic bands to make a pistol grip or boom which attaches to your microphone clip.
Can you tell how much I love my home-made pistol grip and big friendly purple fluffball?
Use the foam (with elastic bands if necessary) to reduce any unwanted vibration or handling noise. - Position the recorder as near to the sound source as possible
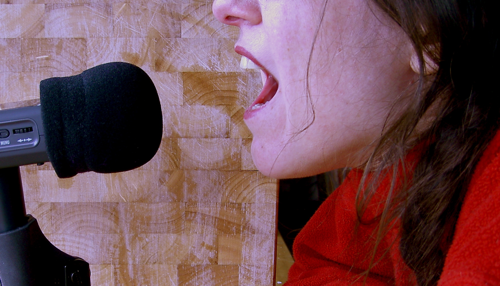
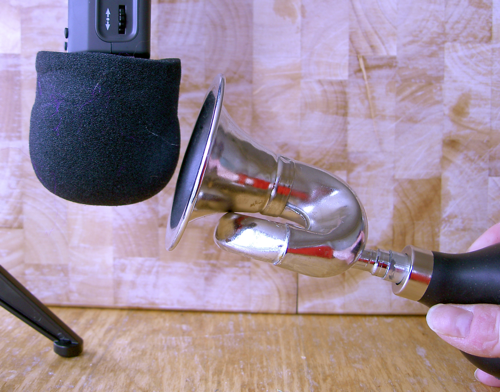
You’ll find that there is no substitute for getting your recorder up close and personal with your sound source. The further away you are, the lower the sound signal and the higher the noise floor will be. If you want good signal levels and little or no other sound, get your recorder as far up the nose of your sound source as you safely can, and use your headphones and recorder screen to ensure your levels remain below the peak limit before recording.
Near …… but not too near. - Keep the record level at ~3/4 of maximum or less
In general, full gain tends to result in noisy recordings. So if you keep your record levels well below the maximum, and your recorder as near as possible to the sound source, you should be able to get recordings which clearly and cleanly feature only your desired sounds.
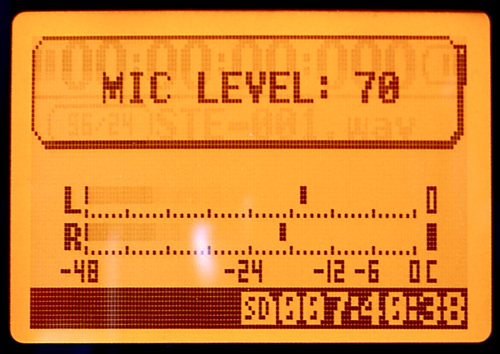
Of a maximum 100, I usually keep my recording levels around 70. - Always record more than several seconds before and after
In order to fade sounds imperceptibly into each other, it’s important to have enough blank sound on either end of the featured sound to allow for subtle slow fading. You can’t use what you don’t have, but you can always decline to use what you do have. So record those extra seconds before and after, and you’ll have them if you need them. - Choose a quiet environment
All kinds of ambient sounds can interfere with recording sound effects, especially if the recording is done in a populated area. Wheeled traffic, air traffic, alarms and building fans can be especially problematic. If you can choose when and where you record, try to choose the quietest possible environment. To get the best possible result from your recording sessions, this usually means going out and about at really stupid hours when everybody else is asleep.
Recording With Portable Digital Recorders – Summary
I hope you found my experiences useful. Before I worked all this stuff out, I recorded a whole lot of stuff during a whole lot of unsociable hours only to get a whole lot of unusable audio. So I do understand the hassle you’ve been through before coming here to read this. I hope this tutorial makes your recording life a whole lot easier!
Summary – Assemble Before Recording
- Portable audio recorder
- Adapter to fit recorder to microphone stand
- Lightweight folding portable desktop microphone stand
- Microphone clip to securely hold the recorder upside down and in motion
- Silicone trivet
- Foam windscreen
- Furry windscreen
- Open-cell polyurethane-rubber soft upholstery foam
- Elastic bands
- 6-inch threaded microphone goosenecks
- Closed-back headphones for monitoring
- Bag to put stuff in
- Soft, close-fitting, quiet clothes and footwear
Summary – Recording Tips And Tricks
- Wear soft quiet clothes with as few rigid parts as possible
- Wear soft, close-fitting clothes which take up the smallest amount of space
- Wear soft shoes with as quiet as possible soles
- Keep your body as still as possible
- Be as comfortable as possible
- Only handle the recorder to adjust position or settings
- Use soft foam to isolate the recorder from vibration as much as possible
- Position the recorder as near to the sound source as safely possible
- Set the record level at ~3/4 of maximum or less
- Always record more than several seconds before and after each take
- Choose a quiet environment
Audio Example
Here is a test recording I made of my footsteps using this boom arrangement.
I went for a walk at stupid o’clock (03:40) on a drizzly morning in Dublin. The recording begins with my footsteps leaving the bedroom, walking on the laminate floor in the corridor, walking through the flat door to the carpet outside, walking through a door to the stairs (the lift is out of order), walking down carpeted stairs, walking through a security door onto a brick-laid path, walking through a security gate and across a badly tarmacked car park (you can hear the grit), walking through another security gate onto the footpath, walking down the hill past two young men with Dublin accents just getting home from the pub at 04:00 or so, and approaching a junction which has traffic at all hours.
The audio is absolutely untouched and you hear it now exactly as it was recorded. The only editing was for length. There is a wee bit of handling noise but nothing like there was before I added the magical foam. This part of the test runs for 07:21. I think it came out spectacularly well, and sounds quite relaxing.
So here is 7:21 of my stupid o’clock footsteps walk test.
Now get out there and record some amazing audio of your own!
(and dress warm) 🙂
I made a printable PDF of this guide which is now available for download! For that and the associated audio file, check out






Well done Spleencast – you’ve managed to crack it!
There is one however – however – I don’t think much of your colour choice including dead cat, footware & clothing (I’m not not being personal here), especially if you intend recording outdoors for nature purposes or just blending in with the background. 🙂
Thank you for your kind words Microscopia. 🙂
I hear you about the colours. My experience with colours and mic windscreen accessories is as follows:
– When recording nature, birds and insects have seemed more willing to tolerate a mic with colours from the blue side of the spectrum rather than red side.
– When recording in populated areas, I’ve been approached more times with suspicion and asked to switch off when I’ve used black or yellow, but the purple has been received by people much more warmly.
So that’s why I chose purple. I did make and use a black one too, which is how I know the difference.
The clothing was just what I had, and sound-wise it fitted the bill, I wasn’t actually thinking about the colours.
You raised a good point about the colours, I’ll have a think and observe and incorporate that more in my decision making. Thank you for bringing that to my attention. 🙂
Oh, I forgot to ask, Microscopia, I get that you thought little of the colours, but for what reasons in particular? I’d be interested to know your thinking on this, I’m sure I could benefit from your experiences. 🙂
I realised after my initial post, that the views expressed may be dependant upon the recordists particular interests and areas of operation. As part of the natural world, we like animals adapt to our surroundings and tend to accept and also become accepted as part of our familiar surroundings (objects, colour, noise, smell, movement etc.). If you for instance, were to try recording in my operating environment using the aforementioned colourful gear, then you would certainly stand out as an interloper (in the best possible sense of the word), as no doubt I would, if I were to enter your local environment wearing my gear!
I can better illustrate this by using two extremes – which you may find a bit humorous on reflection.
remember some of your earlier recordings made at the railway station………….let’s do a re-take, but this time you arrive wearing a ghillie or a yowie suit. What would the reaction be from the Station Master – would he have given you permission to sit there and record or would he have called the Guarda and had you removed? – but at least you would have kept warm!
Similarly if I were to take my recording gear wearing a suit or some other fancy garb and wander in the surrounding fields and woods here, then I would stand out like a sore thumb and soon be spotted and thrown off the land by the local farmer or gamekeeper.
There are also exceptions – here’s one – you could get a lovely recording of the bees in my garden during the summer months – especially with your purple dead-cat and other brightly-coloured clothes. However, you may also receive a lot of unwanted attention from them!
I think the subject of sound recording is so diverse that generalisations should be avoided where possible. A single set of rules and/or equipment cannot be applied to all aspects of the subject.
Having said that, I think you have produced a great article – colour – solarized images – what next!!!
ps: Did I mention the fact that I am colour-blind – true 🙂
Heheheh, ok, I think I understand where you are coming from now, heheheh, that was amusing (and well-explained, thank you). 🙂
I think that was why I didn’t mention colours of clothes at all – however I do think the comfort, close fit, and quiet principles apply for any recording environment, don’t you? Aside from that, I do agree that appropriate garb for the environment is a good principle regardless of audio and no matter what a person is doing. 😛
I think what I learnt was that our mutual recording environments are incompatible, clothes-wise. That’s ok, I suppose I’ll manage to struggle on… 😉 What I’m wondering now is, if you’re colour blind (depending on what variety of colour blindness you have), what was it about my colours in particular which bugged you? 😛
Anyhow, aside from that, I truly appreciate you coming along to read and comment and say nice stuff. Thank you. 😀
Thanks for the tips! These should come in handy. Do you have any advice on typical device settings other than the gain? Filters, Limiters, etc…?
Hello Matt,
Thank you for your comment, I’m so glad you found this useful, that’s great. 🙂
I find that getting the recording I want is easiest if I leave the effects settings strictly alone. I can always apply them later in a sound editor if necessary. I find that effects can mask parts of the signal which sometimes I can end up wishing I had or didn’t even know were there. My experience is that this is the best thing to do for field recording. I mean, I know they’re there and tempting to use and all pretty and gadgety and everything, but in this case, I think simple and easy is best. 🙂
So the only settings I use during recording are the record level, and I’d recommend that to all beginning audio recordists. 🙂
Agreed with everything here. Well written and very true indeed. I especially like the bit about ‘being as comfortable as possible’. How true! Some positions are entirely sane for, say, 10 seconds. Just a pity that you were about to record for 25 minutes… Thanks for this!
Wow, thank you, that means a lot coming from you, I really appreciate that! 😀
And yes indeed, I remember many times getting in a position I regretted the next day because I got all sore from staying still for however long. I find that being still for any length of time is often surprisingly more stressful than moving. :p
Child like circles: So here’s the story. I’ve been messing around with very short films, trying to learn technique and adding to my kit with some very nice lenses and other goodies such as a steadicam. The sound bit was handled by Lavalier microphone or boom mike, both use Senheisser transmitters and the receiver would be plugged into a Canon DSLR. I also found that an iPhone’s recording quality with a decent external mic is suprisingly good, but I had occasions where I wanted stereo sound and so eventually arrived at the purchase of a ZOOM H4n gadget. So, after a bit of googling I spotted your hints and tips about audio and after reading I was about to continue with my searches, when I noticed your recording of your walk through Dublin. So I plugged in my very best earbuds and the next seven minutes had be grinning, smiling, hooping and got all rather emotional. When I was a lad of around 11, my Dad bought me an early Philips Cassette recorder, which came with a mono microphone and I would take this kit everywhere and record all that I could. It was wonderful and until I heard your recording I had forgotten just how fabulous sounds can be. So what else to say, other than a very great big thanks for your ingenuity and time. It’s a splendid recording and I’ll listen-out for more.
Your message brough such a smile to my face! I’m absolutely delighted that my stupid-o’clock schlep round my neighbourhood brought you such pleasure, I had no idea it could do that. 🙂
Thank you so much for bringing a little bit of magic to my day. 🙂
Thanks for a very nice and thorough guide!
I just can’t wait to get my hands on some magical foam. Combined with my generous supply of rubber bands they will most definitely mean victory. The thing is that I’ve been wanting to make my own pistol grip for my Sennheiser m64 and now I think I know how I should go about it without spending a huge pile of money. I’d also like to find someplace here in Sweden that sell those gooseneck stands, seems very handy indeed.
/Magnus
Exactly what I was looking for!
Hi! Do you use the Cubase software that comes with the Zoom H4n? Is there a better when to process sound files? Thanks!!
So sorry, I missed this comment til now.
On Mac OS I use Sountrack Pro, and on iOS 5.1.1 iPad 2 I use a whole plethora of apps, including Hokusai and TwistedWave.